mirror of
https://github.com/SoftFever/OrcaSlicer.git
synced 2025-07-15 10:47:50 -06:00
* Fix Wiki Links

Co-Authored-By: StdVectorBool <4926951+StdVectorBool@users.noreply.github.com>

* Fix Wiki images

* Chamber temp Wiki update

---------

Co-authored-by: StdVectorBool <4926951+StdVectorBool@users.noreply.github.com>
33 lines
No EOL
2.9 KiB
Markdown
33 lines
No EOL
2.9 KiB
Markdown
# Flow rate
|
|
|
|
The Flow Ratio determines how much filament is extruded and plays a key role in achieving high-quality prints. A properly calibrated flow ratio ensures consistent layer adhesion and accurate dimensions. If the flow ratio is too low, under-extrusion may occur, leading to gaps, weak layers, and poor structural integrity. On the other hand, a flow ratio that is too high can cause over-extrusion, resulting in excess material, rough surfaces, and dimensional inaccuracies.
|
|
|
|
> [!WARNING]
|
|
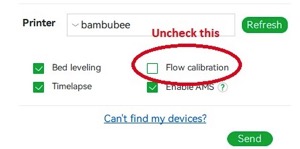
> For Bambulab X1/X1C users, make sure you do not select the 'Flow calibration' option.
|
|
|
|
> 
|
|
|
|
> [!IMPORTANT]
|
|
> PASS 1 and PASS 2 follow the older flow ratio formula `FlowRatio_old*(100 + modifier)/100`. YOLO (Recommended) and YOLO (perfectist version) use a new system that is very simple `FlowRatio_old±modifier`.
|
|
|
|

|
|
|
|
Calibrating the flow rate involves a two-step process.
|
|
|
|
1. Select the printer, filament, and process you would like to use for the test.
|
|
2. Select `Pass 1` in the `Calibration` menu
|
|
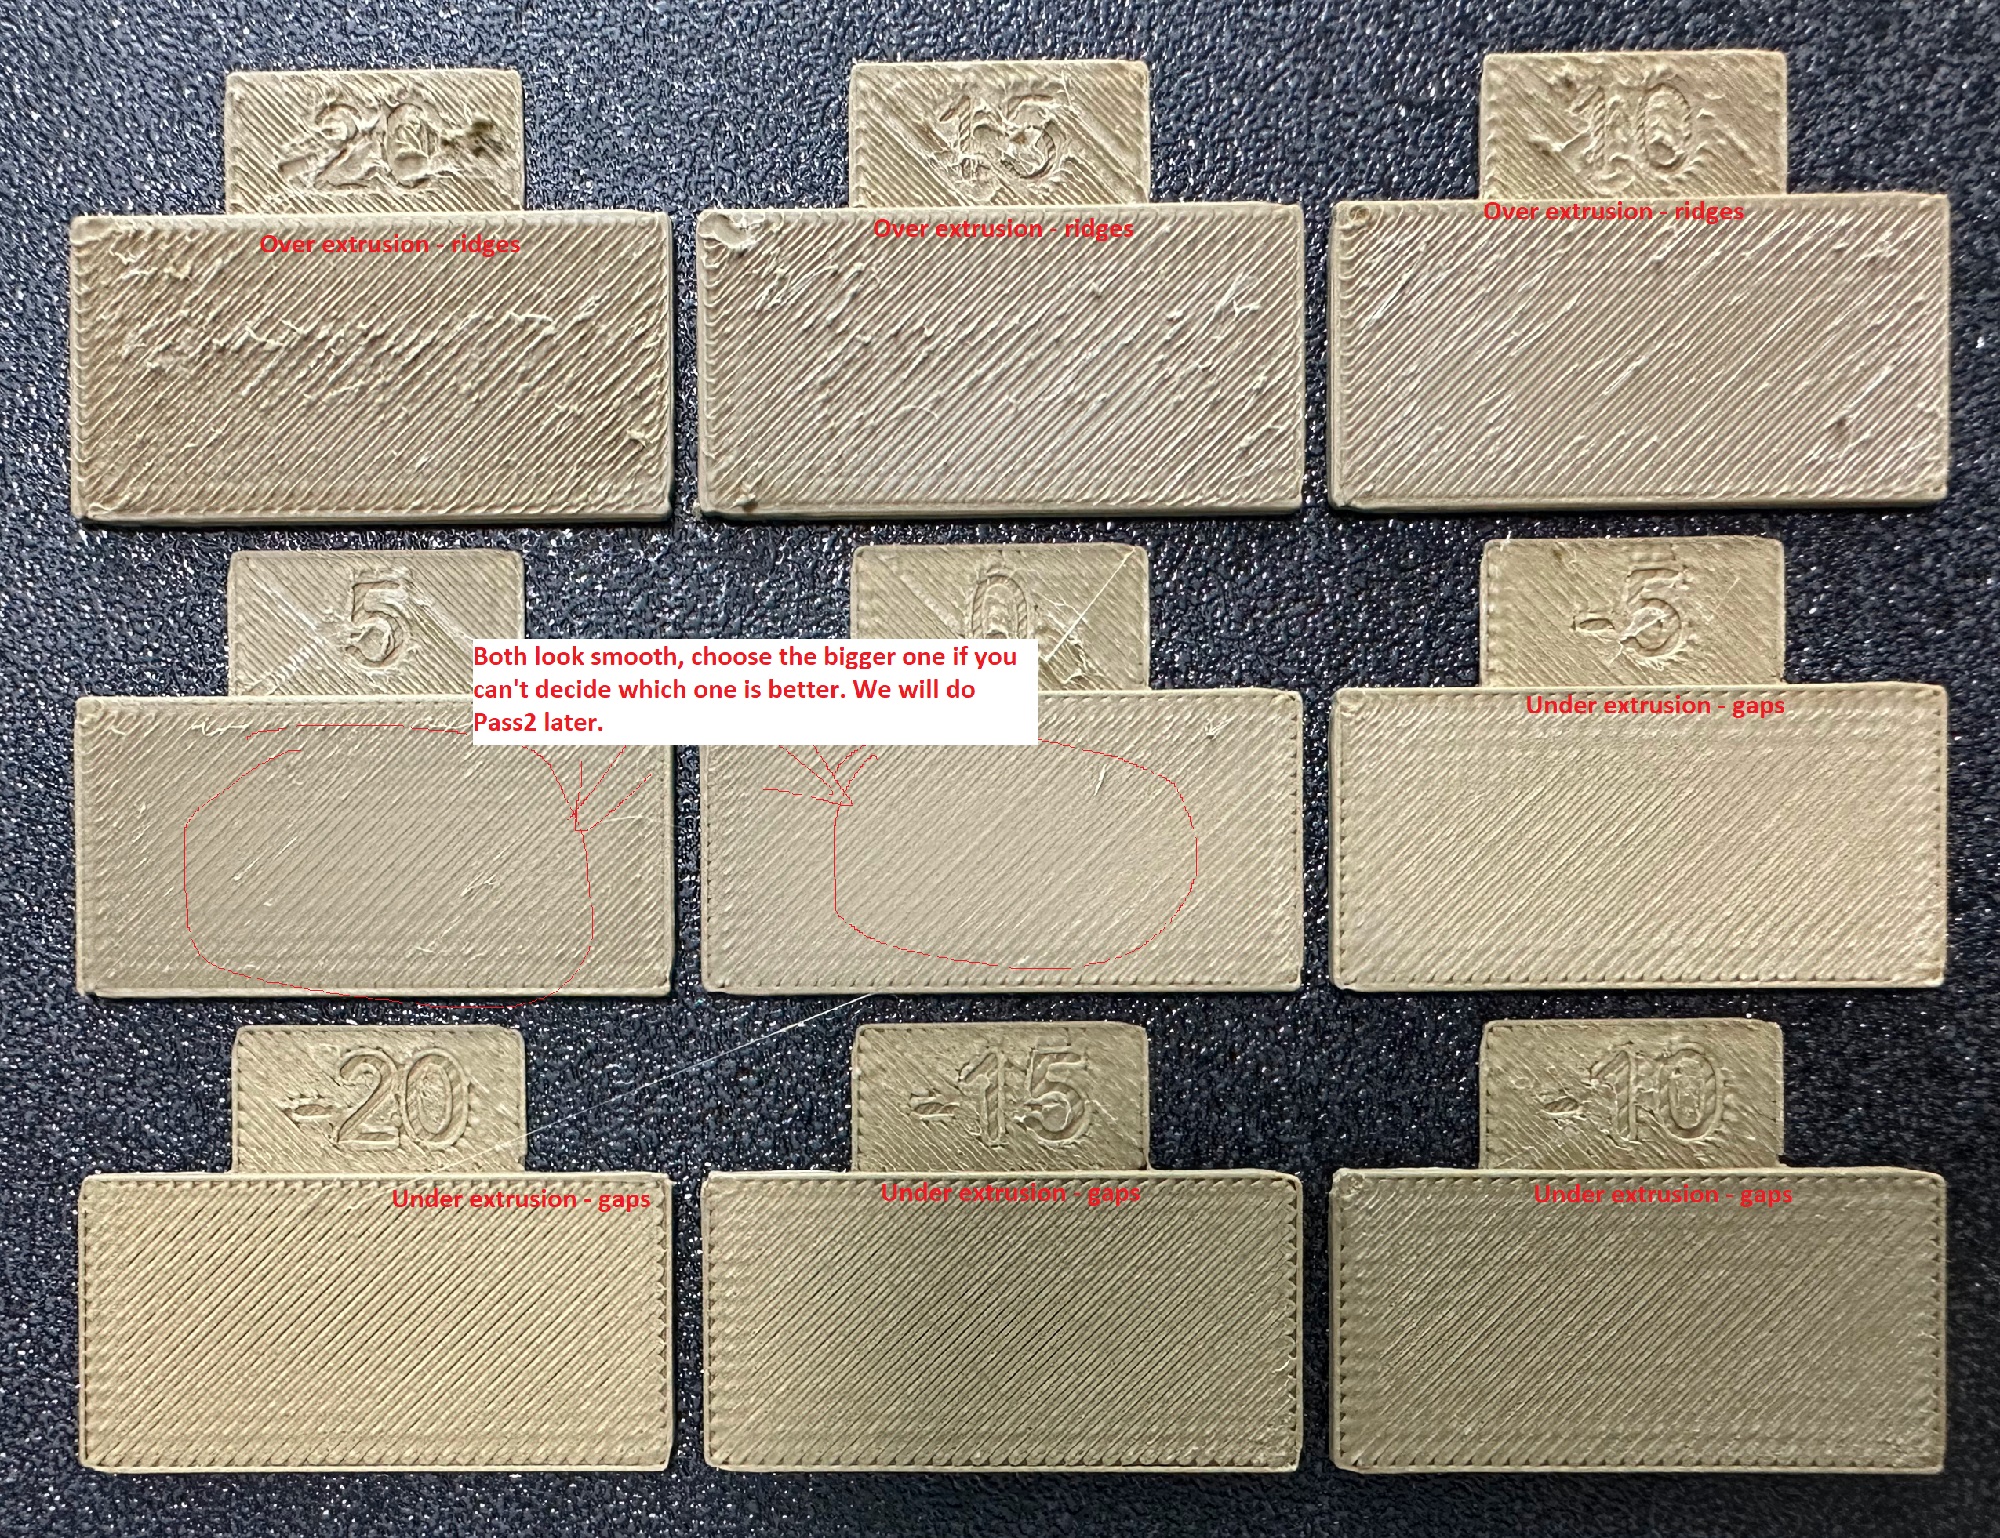
3. A new project consisting of nine blocks will be created, each with a different flow rate modifier. Slice and print the project.
|
|
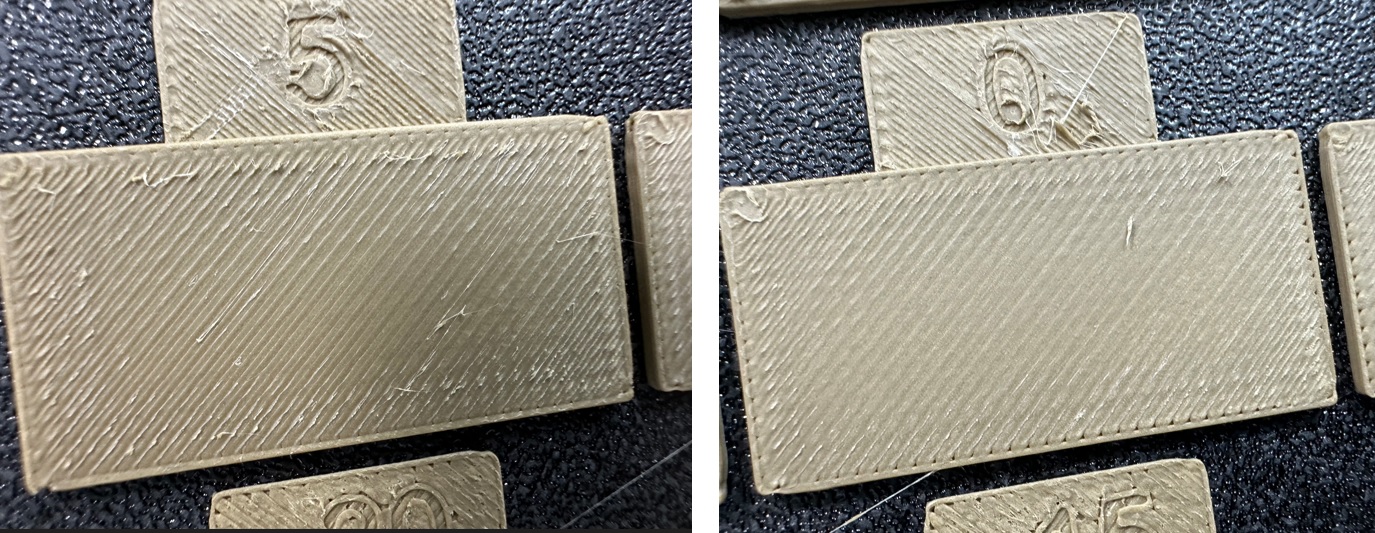
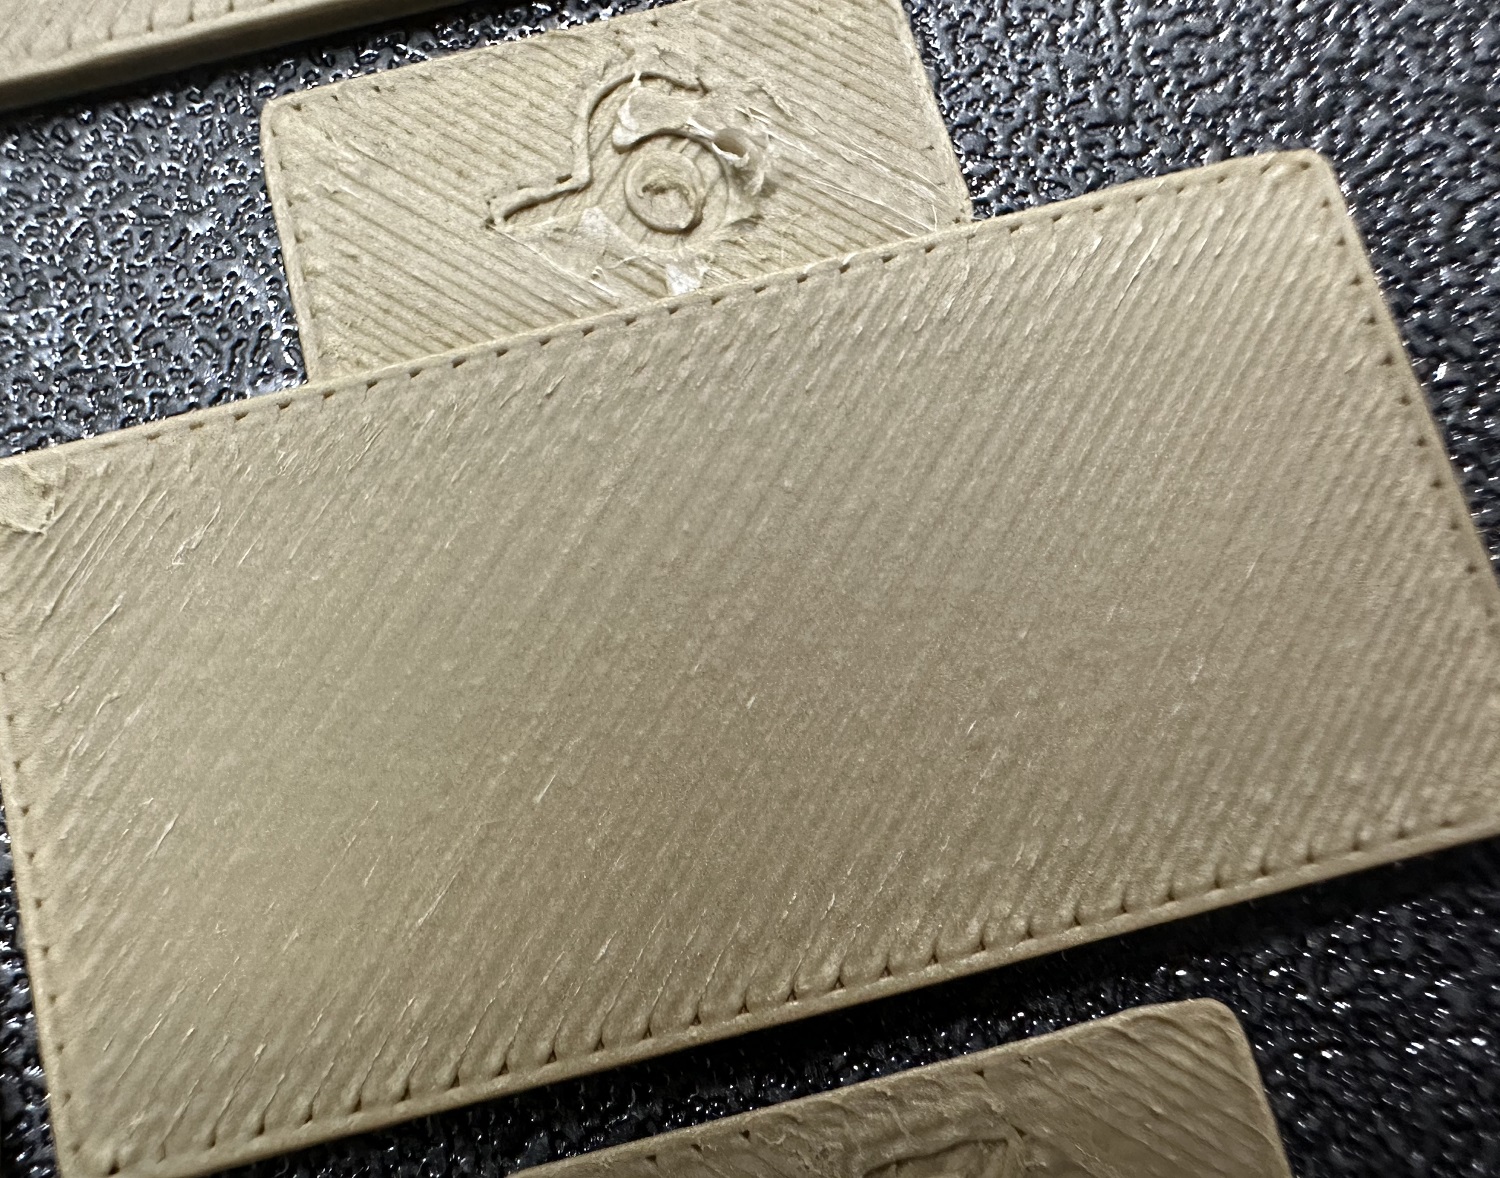
4. Examine the blocks and determine which one has the smoothest top surface.
|
|
|
|
|
|
|
|
5. Update the flow ratio in the filament settings using the following equation: `FlowRatio_old*(100 + modifier)/100`. If your previous flow ratio was `0.98` and you selected the block with a flow rate modifier of `+5`, the new value should be calculated as follows: `0.98x(100+5)/100 = 1.029`.** Remember** to save the filament profile.
|
|
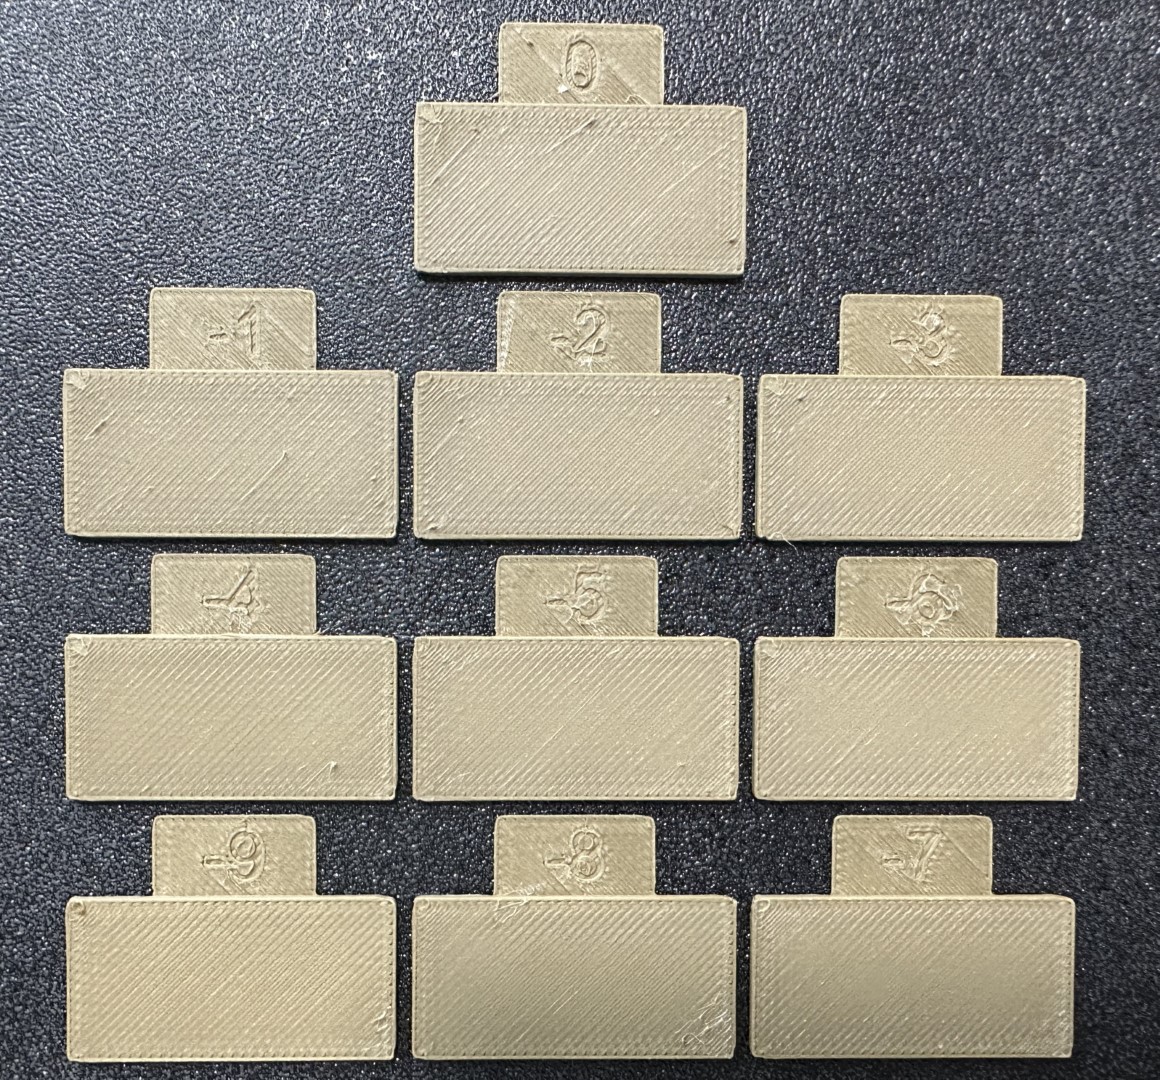
6. Perform the `Pass 2` calibration. This process is similar to `Pass 1`, but a new project with ten blocks will be generated. The flow rate modifiers for this project will range from `-9 to 0`.
|
|
7. Repeat steps 4. and 5. In this case, if your previous flow ratio was 1.029 and you selected the block with a flow rate modifier of -6, the new value should be calculated as follows: `1.029x(100-6)/100 = 0.96726`. **Remember** to save the filament profile.
|
|
|
|
|
|
|
|

|
|
|
|
> [!TIP]
|
|
> @ItsDeidara has made a html to help with the calculation. Check it out if those equations give you a headache [here](https://github.com/ItsDeidara/Orca-Slicer-Assistant). |